Specification

Min/Max Operating Pressure |
0.58bar ~ 8bar (7.25psi ~ 116psi) |
Working Temperature |
4.5°C ~ 45°C (40°F ~ 113°F) |
Power |
2x AA alkaline batteries |
Waterproof |
IP55 |
Rain Delay Time |
1 day and up to 7 days |
GUIDANCE NOTES
- For outdoor use only.
- Clean the filter regularly and replace if it is worn in order to extend the working life of timer.
- In winter, please remove batteries, drain and store it indoor to keep away from freezing.
- Do not install the timer with tools. Hand tighten ONLY. Use of tools may damage the timer.
- Do not subject the product to extreme force and shock.
- To prevent leakage, make sure that the water timer is tightly attached to the faucet and hose, add rubber washer and thread seal tape if necessary.
PRODUCT INSTALLATION
1. Installing the Batteries
a. Remove the battery cover on back of the timer.
b. Install 2 new AA (1.5V) alkaline batteries (not included).
c. Firmly reinstall the cover back into the timer.
Instructions
• Firmly restore the battery to ensure water resistance.
• Removed old batteries at the end of the watering season and disposed of them properly.
• Replace batteries when the low battery indicator appears on display.
• Please do not insert rechargeable batteries to avoid low voltage.
• The timer doesn’t have programmable memory, it needs to reset once power off.
2. Installing The Timer

a. Attach the timer to an outdoor hose faucet.
b. Please turn on the tap after programming the timer.
Instructions
• When programming the timer, please turn off the tap to avoid getting wet.
• Do not install the timer with tools. Hand tighten only.
• Keep away from freezing. Timer should be removed to avoid freezing damage.
• Filter can trap dirt particles, please clean filter regularly and replace if worn.
AUTOMATIC WATERING PROGRAM SETTING

• When the batteries installation finished, the Large screen will display (OFF).
• Please make sure the batteries are new and full power.
1. SET CLOCK
1. Click ![]() button to select 12H/24H by turning right or left, press (OK) to next step.
button to select 12H/24H by turning right or left, press (OK) to next step.
2. Use the dial to set the current time by turning right or left. chang.
3. Press the (OK) button to switch time (Hours or Minutes).
4. Click ![]() button to next step and save changes.
button to next step and save changes.
2. SET START TIME
1. Use the dial to set START TIME by turning right or left.
2. Press the (OK) button to switch time (Hours or Minutes).
3. Click ![]() button to next step and save changes.
button to next step and save changes.
3. SET HOW LONG
1. Use the dial to set HOW LONG by turning right or left to select watering duration.
2. Press the (OK) button to switch time (Hours or Minutes).
3. Click ![]() button to next step and save changes.
button to next step and save changes.
TIPS: The maximum duration is 5hrs and 59 mins
4. SET HOW OFTEN
1. Use the dial to set HOW OFTEN by turning right or left to set the watering frequency.
2. Click button to next step and save changes.
TIPS: The watering frequency range: 1-23 hrs and 1-7 days
5. AUTO
1. When in AUTO mode, the screen will display the current time and follow with the next watering time.
2. The timer will execute the watering plan automatically.
NOTE: The screen will be asleep in 30 seconds after no operation.
6. OFF MODE
1. When in AUTO mode, Click ![]() the button, the screen shows OFF.
the button, the screen shows OFF.
2. All programs are saved and the timer stops working.
ADDITIONAL FEATURES
MANUAL WATERING

Please make sure the timer is in AUTO Run state.
1. Press the ![]() button for 3 seconds and turn the DIAL to select watering duration from 1 min to 59 mins.
button for 3 seconds and turn the DIAL to select watering duration from 1 min to 59 mins.
2. Press (OK) button, it will start to water.
3. Press the ![]() button again, it will stop watering and switch back to Auto mode.
button again, it will stop watering and switch back to Auto mode.
RAIN DELAY

Please make sure the timer is in AUTO Run state.
1. Hold and press (OK) button for 3 seconds to enter the RAIN DELAY mode.
2. Turn DIAL to set the delay time from 1 to 7 days.
3. Press (OK) button to save changes.
4. Press (OK) button for 3 seconds again, it will quit and switch back to Auto mode.
FAQ
Q1: The LCD screen does not display anything when the batteries are installed.
A1: Two batteries loaded are new 1.5V AA alkaline batteries, make sure the batteries are properly placed in the battery box.
Q2: The hose tap connection/outlet leaks.
A2 check if:
• The O-ring is connected correctly to the hose tap.
• The connection outlet or water pipe is broken.
• The faucet and water pipe have a different thread.
• If necessary, please use an appropriate adapter or PTFE tape.
Q3: Water does not come on at preset time.
A3 check if:
• Clock should be set to the correct time.
• Start time is set to desired the time.
• Rain Delay is on.
• OFF mode is on.
• The batteries are low.
• The faucet is turned off.

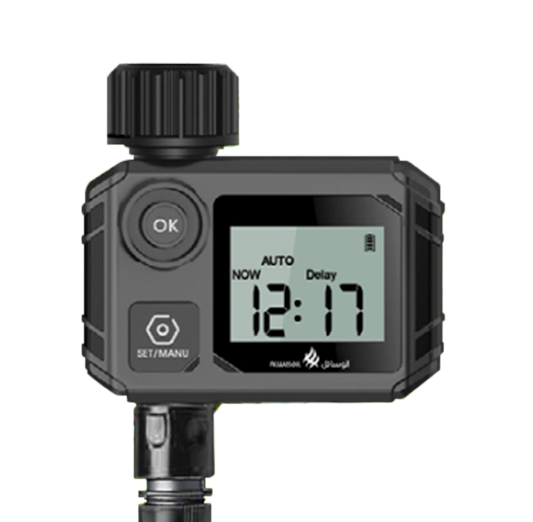
| Battery Indicator | |
| Watering | |
Delay |
Rain Delay (1 – 7 days) |
Now |
Current Time |
Next |
The Next Watering Time |
SET CLOCK |
Set current time |
|---|---|
START TIME |
Set the time of start watering |
HOW LONG |
Set watering duration (1 minute to 5 hour 59 minute) |
HOW OFTEN |
Set watering frequency (1 ~ 23 hours and 1 ~ 7 days) |
AUTO |
Start automatic watering based on your programs |
OFF |
Turn off all watering programs and shut off the valve |